We use cookies to make your experience better. To comply with the new e-Privacy directive, we need to ask for your consent to set the cookies. Learn more.
Toggle Nav

Search
Ereagle Camera Testing
EREAGLE TECHNOLOGY E3H
CAMERA TESTING
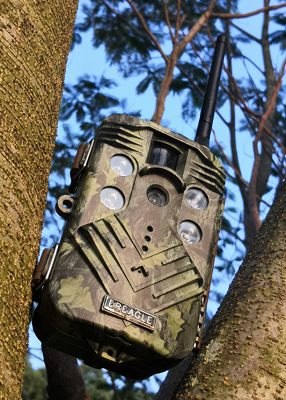
The E3H Wireless Camera from Ereagle Technology is a new addition to our Trail Cameras range, introducing the unique remote Hotspot connection ability. This unique technology has been long sought and awaited by nature-lovers, giving you access to the footage from your garden from the comfort of your home.
No more SD card retrieving on a rainy day, no more power cables or weak WiFi connections. The Ereagle HotSpot Trail Camera has arrived to solve it all. Now, it is only fair to mention that this is not the easiest trail Camera to set up amongst all the cameras we have tested here at our HQ. In fact, most of us found it to be quite a challenge. However, once you go through the instructions and get it to work it becomes a great piece of nature observation equipment.
Contents:
The camera comes with two instruction manuals (one for the camera installation and one for the device connection) and accessories including very important pieces like an antenna, magnetic key, heavy-duty tree mounting strap, and other small bits.
Where to start
After playing with this camera for some time now I would say - first of all - screw the antenna on. This makes a massive difference when it comes to setting up this trail camera. It is the crucial step, so often overlooked!
Before turning the camera on, we take a closer look at the accessories included.
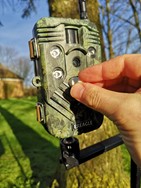
In the bag, we will find a little spanner, 2 screws that can be used to lock the front of the camera once it is set up, an antenna, and a small white pin / magnetic key.
A small remote is also included in the box, this will work with a CR2032 battery that we supply with your order. The camera itself will require 8x AA batteries or an AC cable - these are not included.
Turning the camera on
Download the app by scanning the QR code in your instruction manual or search for TSCAMERA App. While the app is downloading you can put the AA batteries in the camera.
There are three ways to turn this camera on. I found it confusing at first as it doesn't just come on after putting the batteries in and it has no visible on-button anywhere. There is also no screen so the experience is very different from what we are used to with other trail cameras.
This is where we can use either the magnetic white key and touch it by the sticker at the front of the camera, or the remote. You can also open the camera and find the red button inside. The remote proved to be tricky to open and you have to be careful not to break it before you even start using it.
I personally like using the magnetic pin to turn my Ereagle on. You will hear a little beep sound and the green light will come on - your camera is on!
Using the Remote Control
For the Test Mode, you need to press button A for 1 second, the red light will flash once.
The control command is sent and waiting for the reply. When you see a green light
flashing once, it means that the action was successful and the camera is in test mode.
For the Work Mode, press button B.
Please note: When using the remote control to control the camera, you will not see any lights or hear any sounds. If you
can successfully connect the APP, it means that you managed to get the remote to connect to the camera.
Now back to the app, which should now be downloaded on your mobile phone.
The only way to see if the camera is working properly, to see your footage, or adjust any settings is through that app. To be able to do this - you need to connect your camera to your phone.
Using the HotSpot and connecting your camera to your phone
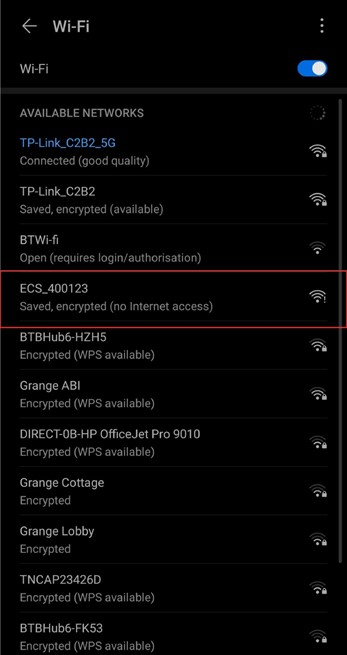
You will now go to your WiFi settings on your phone and switch from your home WiFi network to WiFi generated by the camera. The camera is called “ECS” followed by a 6 digits number. You need to find this amongst other networks and then input the standard password which is “12345678”.
When using the white pin or the red button, the red light at the front of the camera will turn on when the camera starts booting. Moments later a green light will turn on, indicating that the camera is now ready to be paired.
When using the remote, the camera will not show any light so we need to press the A button for 1 second and wait for approx. 60 seconds.
Once the camera is on, and both the red and green lights are on, we are now ready to pair.
The APP and the settings
Test Mode
Once the camera is paired up with your mobile device, it will automatically enter the Test Mode (the green light will now be flashing). This mode allows us to Live Stream the footage through the app.
While running Test Mode we can explore the camera’s settings. We can also decide what settings the camera should follow when we put it into Work Mode.
Work Mode
Work mode will keep the camera on standby till the sensor is triggered by any movement in front of it.
In the settings section, we can decide what video resolution to use, what image size to choose, how many pictures should be taken every second, and many more.
Should you choose so, the info bar in the picture will show the battery status, temperature, date, and moon phase.
To enter Work Mode, you can tap the button on the app or one of the three methods as before. Upon entering work mode, the lights switch off and 4 beeping sounds are heard. You can place the camera somewhere suitable and let it capture beautiful pictures and videos of wildlife.

Once in Work Mode, the camera is no longer connected to your mobile phone.
From Work Mode, you may go back and pair your device again using any one of the 3 ways. Turning off the camera will switch off the lights and emit an elongated beeping sound. The installation process takes around 10 to 15 minutes, and it’s fairly straightforward.
Camera Features
Once you manage to pair the camera up with your phone and personalise the settings, it will function independently and efficiently. There is not much of a delay between the camera image capture and data transfer, which makes the experience realistic and enjoyable.
Thanks to its 1080p at 60 fps resolution, videos are of amazing quality and photo resolution can be set at up to 20 MP.
Our thoughts
This Ereagle WiFi Trail Camera explores a relatively new field for traditional trail cameras and does not come without flaws. The WiFi hotspot the camera creates is not as strong as advertised by EREAGLE and tends to disconnect from the device when reaching a distance of about 20 meters (claiming 30 meters distance).
You can still use it as a regular Trail Camera and get great quality footage, but we did expect these 30 meters. Paring up the camera could also be quite frustrating and not always straightforward (do not forget the antenna!!) - hence the detailed instructions above. The instruction manual is not as helpful as we expected, but once the camera is set up the results are quite impressive.
The main advantage of this camera is that once you connect to the app, you can access all the images and videos taken by the camera on your smartphone! You can save them to your phone and share them with friends and family if you wish.
When you’re in Test Mode, and live streaming, you can also take pictures and record videos. These are all still recorded on the SD card; but the idea of this camera is that you can access everything without the hassle of taking out the SD card, connecting it to a computer, and then transferring the images to your mobile device.
Connecting to the app and doing everything from there is the solution we were waiting for and Ereagle delivers it!
TsCamera APP Setup/ Android
To set up your camera please download the TsCamera App from PlayStore.
Please make sure that GPS is active and Mobile Data is switched off.
- After downloading the App, please ensure that your camera is set on “Test Mode”
When the green light is shown on your camera the device will be ready to pair.
- Please open “Network Settings” on your mobile device and connect to “ECS_xxxxxx” using the password “12345678”.
- After connecting your mobile device to the camera network, you can now launch TsCamera App on your mobile.
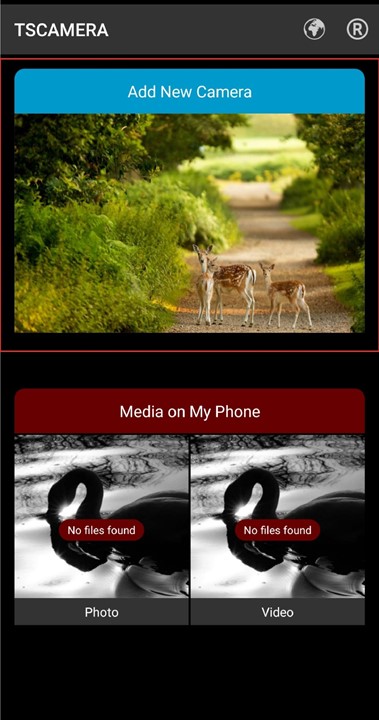
- From the App main screen, please tap on “Add New Camera”, to access your camera view.
TROUBLESHOOTING
- If experiencing issues with connecting your camera using an Android Device please ensure that GPS Location is On and Mobile Data is Off. Also please ensure to allow all the permission for TSCamera.
You can easily access these Settings by dragging down the tray from the top of your screen. - Make sure you know what mode you are in. Test Mode works differently and you need to switch between modes as per instructions.
- Antenna - it must be screwed on for the camera to work.
- Remote control - it will not work without batteries. Using the magnetic key to turn your camera on can help.
- Camera not connecting to an APP - try to change the batteries for the fresh set. The camera might have just enough power to operate but not to connect via HotSpot.
- Remote not working after pairing up - operation might have timed out and you need to repeat it.